Showing posts with label purpleheart. Show all posts

Wednesday, January 11, 2012

Almost Finished...

Almost Finished...


Well the guitar is working. It still doesn't have the control plate on yet. I need to drill a couple of holes, and finish the preamp so I can put it all together. Also, I need to round over, smooth, and polish the frets. But once that is all done, I will be playing this quite a bit -- even in the dark!

Purpleheart LED fretboard

Purpleheart LED fretboard
  • I drilled 5mm holes for my 5mm Ultra-bright blue LED's.
  • I drilled in from the back of those holes with a larger drill bit to accommodate the base of the LED. I drilled this larger hole just deep enough so that the rounded tops of the LED's poke through the top.
  • I used a milling machine to cut grooves in the back of the fretboard.
  • I twisted the wires together and soldered the connections.
  • I sanded the tops off of the LEDs.
  • Afterward I put fret wire into the slots, smashing down the copper wires.

 The milling machine, which made my life easier. If my dad didn't own this 
wonderful machine, I would have had to use a router or a Dremel tool.

 Lines drawn where I wanted grooves or channels cut


 Looking kind of fuzzy. Needs some sanding.


 Lines drawn where I need to cut off the sides.


 Sides cut off; bottom cut off.

 All the components I bought from allelectronics.com.

I followed instructions I found on a YouTube video by a user named koenbus.
I used LED's with a 3.6 V drop, and I used 300 ohm resistors for a 
single LED, or 150 ohm resistors for two LED's in a row. 


After I soldered the components together with red wires for +9V and black wires for ground 

 LED's on!!! They're so bright, it almost hurts to look directly at them.

No frets yet, and copper wires poking through tiny little holes.
Later, this allows me to use the frets and the strings together as a switch. 

The round part of the LED's are poking through the top... 

...and now the rounded tops are being filed down flat. 


I apologize for the fuzzy pictures. I am getting better at taking pictures now.

Cutting Slots in Fretboards

Cutting Slots in Fretboards

Here is how I made some fretboards in early 2010. I haven't had the need to make any new fretboards since, because I took a break from making guitars.

I started out using a handsaw that was about 0.020" thick that I bought at Harbor Freight tools. It was very cheap. I only managed to use that saw on one fretboard and it got too dull to use any longer.

Then I bought a 0.023" tablesaw blade from StewMac and it made my life much easier. I made these four fretboards in just a few hours.

There are four fretboards shown; two purpleheart, one walnut and one Jatoba.

Here is the guitar neck with truss rod slot and the bare fretboard intended 
for the LED guitar. I copied the guitar neck on the right.


The "epic fail" fret saw. I spot welded sheet metal to the sides, and then 
super-glued plexiglass strips to act as a depth stop.


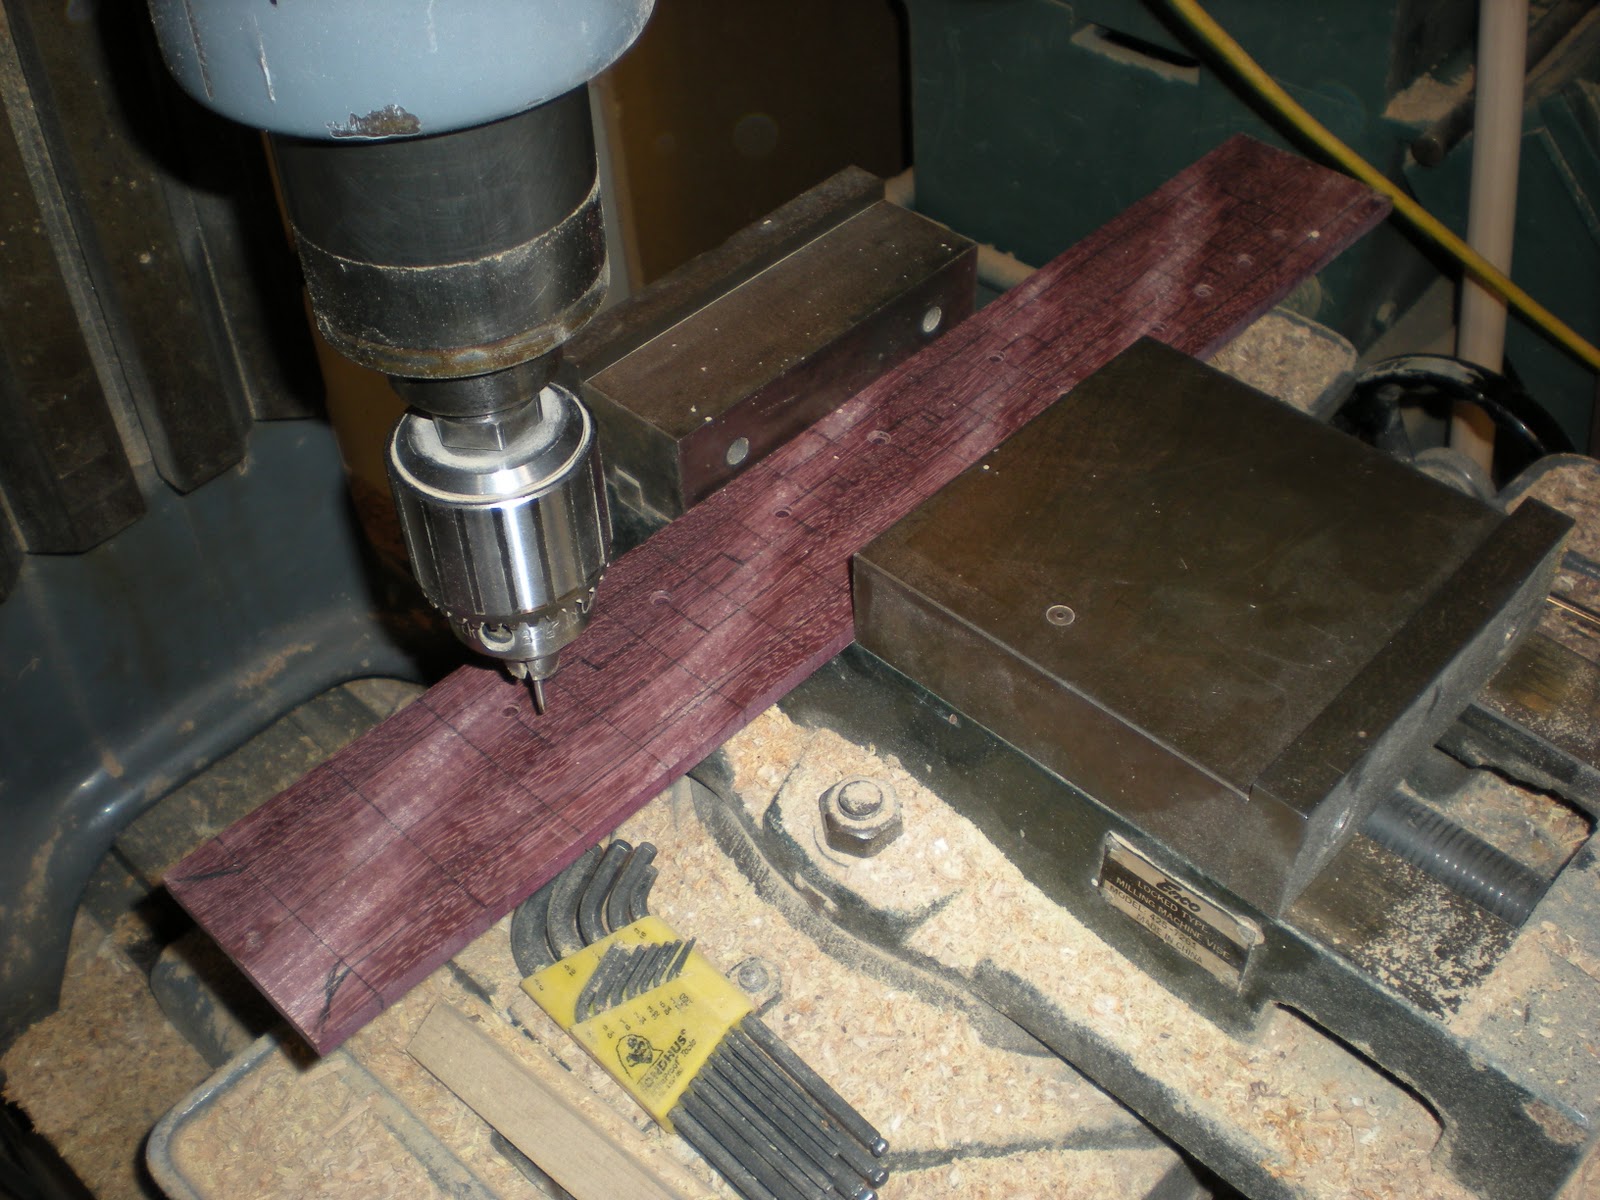
I simply marked the distances with a good ruler, and then used a square to draw the lines. I also used the square to hold the fretsaw next to it while I sawed away. It worked... until the saw got dull.


The new table saw blade and the template I made. As you can see, the 
template had slots I cut with a thicker table saw blade, and I used a 
woodscrew as the template pin. I screwed the pin into my 
table saw fence and then sawed the screw short.


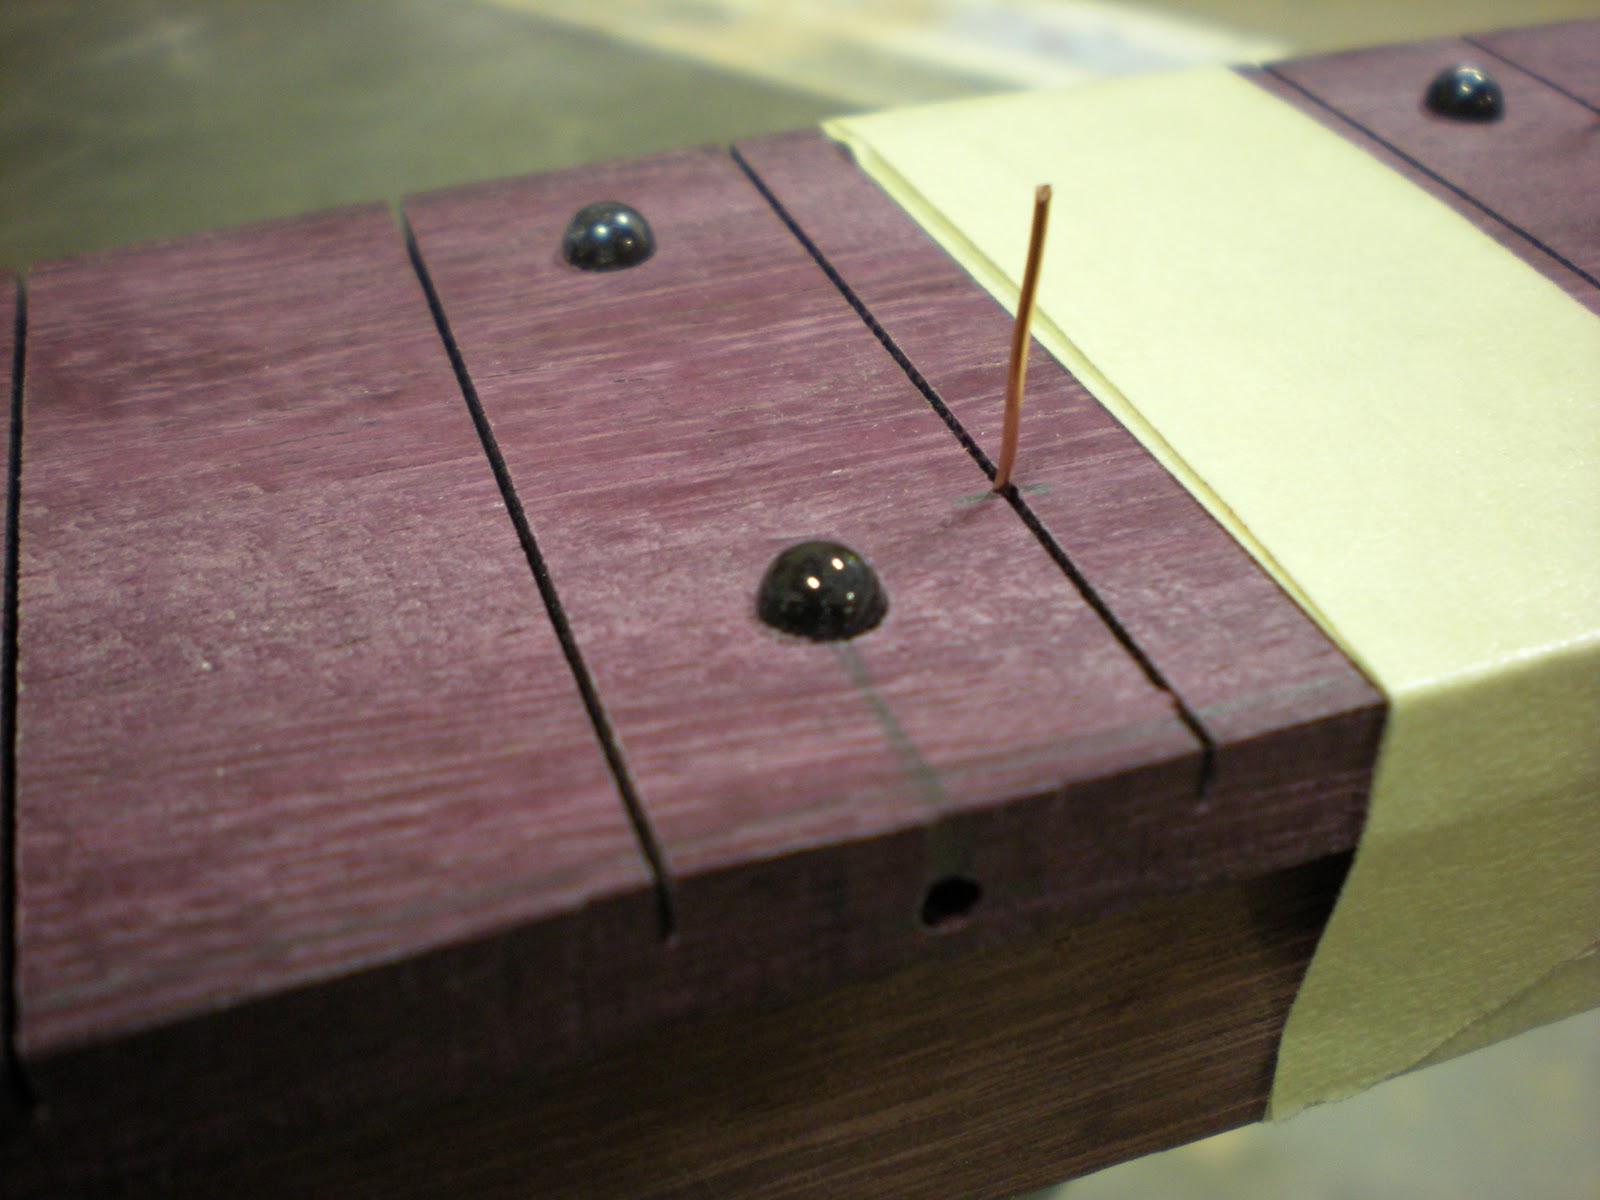
A closer look at the template pin


I practiced on a piece of poplar wood first.

Jatoba (Brazillian Cherry)

Walnut in the middle, purpleheart on the sides


The tablesaw blade/fret slot cutter.