It started when I got my hands on an old Stewart-MacDonald catalog, and my dad suggested that I make my own guitar. (He was always looking for ways to get me to do hobby woodworking.) So I bought a book on guitar building: Building Electric Guitars by Martin Koch. I highly recommend that book.
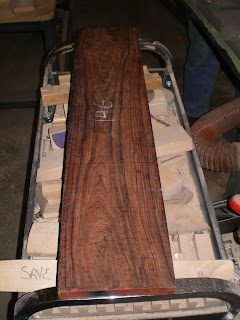
Shortly thereafter, my dad and I took a trip up to MacBeath Hardwood in Salt Lake City and he bought me a nice block of cocobolo wood to make a fretboard from. It was a beautiful (and expensive) piece of exotic wood, all covered in wax. I still have enough to make a few more fretboards, but I hoard this block of wood because it is so beautiful... and expensive. It will have to be one stellar guitar for me to use the rest of the cocobolo. This is a fond memory of mine, going to the hardwood place with my dad and him selecting a nice specimen for me.
A lot of preparation went into this guitar. I actually drew out a full-scale drawing of the guitar first on some poster paper. I got out some long yard sticks and pens and markers and drew the full scale of the neck, all the frets and EVERYTHING on paper first. It took a while, but it was worth it. I even cut out the paper guitar and held it on my lap to see how it "felt."
This is a 5-string fretless bass guitar. It is a neck-through design, meaning the neck is not bolted on or glued into a slot, but the neck travels all the way to the bottom of the guitar. This makes for a very strong neck. I used a piece of 10/4 hard maple for the neck. 10/4 means that it is 2-1/2" thick. Very thick piece of wood, also very pricey. Luckily for me, my dad hoards wood and had this board stashed away on a shelf. He had no other use for it, so he let me have it.
Here is the main neck piece with a 1/8" thick lamination layer I added.
I knew I wanted the side pieces to be made of Padauk,
so I made a thin veneer piece and glued it to the top.
Truss rod in place.
I cut the side profile first, but kept the scrap to use later.
I taped it together to cut it on the band saw.
After the top profile was cut using the band saw.
Roughly cut with a band saw.
Nothing like some files and rasps to shape a neck.
A hand-held pneumatic orbital sander also comes in handy.
Looks pretty good if you sand out all the bumps.
Cocobolo wood.
Splitting wood on the band saw.
This picture is the most true to the color of the wood in real life.
Beautiful grain on this piece of cocobolo.
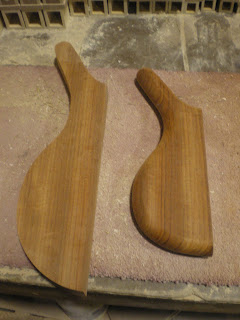
Sides cut out of Padauk wood. This is 3 years after I started this project.
Notice that in 3 years the Padauk veneer has already aged and darkened more than the sides.
After I glued it together, I sanded down the veneer until the "pumpkin" color came back out.
Padauk is this gorgeous pumpkin orange color when you first cut it.
It eventually ages to be a deep reddish color.
It is nice to look at, but it is also very heavy.
You would not want this guitar on your shoulder for a 3-hour gig.
Amazing what a router bit can do to make it look organic.
This is after I glued the side pieces onto the main neck slab.
Pencil and ruler to mark the fret slots.
I ended up using some strips of Padauk as "frets."
This lets me see where my fingers need to go, but still have that fretless sound.
That's all for this post. There are finished photos of this guitar if you look at my first blog post, and I might add more photos in the future. This is probably the prettiest guitar I have made to date, although I have an even nicer one planned for the future...


No comments:
Post a Comment