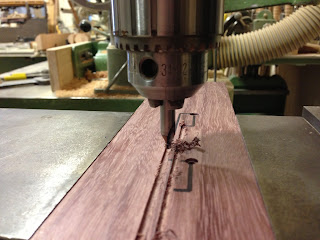
Mark the centers with a pencil and use a center punch.
Use a drill bit which cuts a 5mm hole (for a 5mm LED), this is about 0.191-0.193" in diameter.
Next, use a 1/4" forstner bit to cut a flat-bottomed hole on the back side.
Only drill in about 1/16" deep.
Draw lines where you want to mill channels.
Cut off the sides and bottom with a band saw.
Semi-finished product. Ready to wire up and solder.
Warm white 5mm LEDs from allelectronics.com
Unfortunately I did not know the forward voltage drop that these LEDs require, so I put them in series with 300-ohm resistor to measure the voltage drop with my multimeter. These particular LEDs measure a 3.0 V drop. Good to know when choosing resistors. It also measures about 3.0 V when I use a 600-ohm resistor, or even a 150-ohm resistor. The voltage drop should be more or less constant since it is a rectifying component rather than an ohmic one.
Resistance R= (9V-3V)/0.020A = 300 Ohms. Looks like I'll be using 300 ohm resistors for this one, and a 150 ohm resistor for the two LEDs in series on the 12th fret.
The resistor should be able to handle enough power. Power P=I*V = 0.020A * 6.0 V = 0.12 Watts.
So I should technically be safe using a 1/8 W resistor, but just to play it safe I will use a 1/4 W resistor instead. It would be a disaster if your resistor burned up inside of your guitar neck, so use a slightly higher power rating for your resistors.


No comments:
Post a Comment